MS Windows NT 4.0 Setup
This page will provide you instructions to setup Windows NT for
to dial-up with Access Internet. At this point you should have a valid
username, password, and your Windows NT 4.0 CD-ROM.
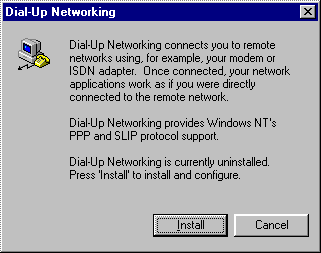
Install Dial-up Networking
-
Double click My Computer then double click Dial-up Networking
-
If at this point you received a message stating:
The phonebook is empty. Press O.K. to add an entry
skip to the next section Create a Dial-up Networking Connection
If the Dial-up Networking window came up with the phonebook list and the option to dial skip
to the next section Create a Dial-up Networking Connection
Otherwise, click Install
then enter the path to your NT 4.0 installation files (for example D:\i386)
and click OK.
-
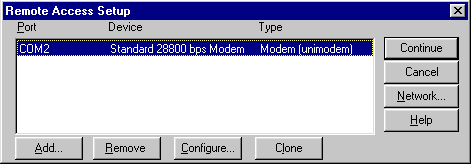
Verify the correct modem is selelcted in
RAS Capable Devices
Then click OK

If you didn't see a modem listed:
-
Click Install Modem
-
The Install New Modem wizzard should come up.
Click Next to have Windows NT detect your modem.
-
Once NT detectes your modem continue through the wizzard.
NOTE: If Windows NT couldn't detect a modem, you'll be presented with a list of modems.
Select your modem from the list and proceed. If you couldn't find your modem listed
you will need to refer to your modem's documenation or contact the manufacturer.
-
Select your modem and click Configure
-
Select Dial Out Only
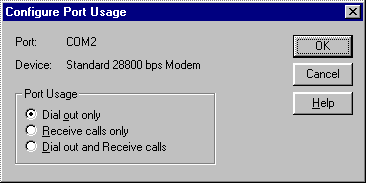
Click OK
-
Click Network
-
Uncheck NetBEUI
-
Check TCP/IP
-
Uncheck IPX
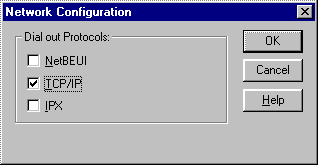
Click OK
-
Click Continue in the Remote Access Setup window.
-
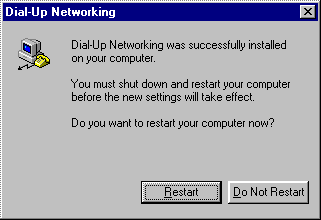
After Dial-up Networking installation is complete, click Restart
Create a Dial-up Networking Connection
-
Double click My Computer then double click Dial-up Networking
-
If you receive the message:
The phonebook is empty...
Click OK
Otherwise, click New
-
If the New Phonebook Entry Wizard comes up,
check:
I know all about phonebook entries and
would rather edit the properties directly
and click Finish
-
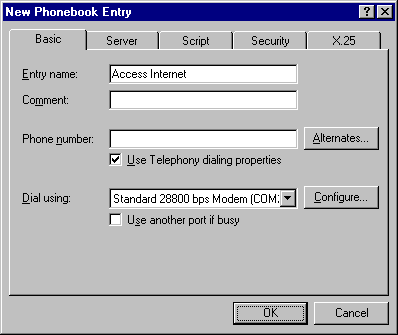
In the Entry name: field enter: Access Internet
In the Area code: field: enter the proper area code.
In the Phone number: field: enter a local POP (Point Of Presence).
NOTE: Refer to our Points Of Presence (POPs)
for a local number to you.
Check Use Telephony dialing properties
Under Dial using: make sure your modem is selelcted.
Uncheck Use another port if busy
-
Click Configure...
-
Set the Initial speed (BPS) to:
-
19,200 if you have a 14.4k modem
-
38,400 if you have a 28.8k/33.6k modem
-
115,200 if you have a 56k modem
-
Under Hardware Features
-
Check Enable hardware flow control
-
Check Enable modem error control
-
Check Enable modem compression
Uncheck Disable modem speaker
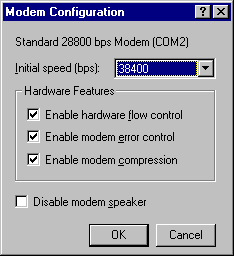
Click OK
-
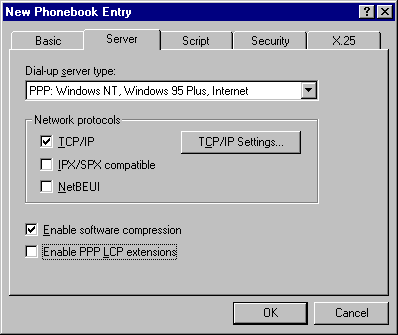
Select the Server tab
Under Network protocols
-
Check TCP/IP
-
Uncheck IPX/SPX compatible
-
Uncheck NetBEUI
Check Enable software compression
Uncheck Enable PPP LCP extensions
-
Click TCP/IP settings
Select Server assigned IP address
Select Specify name server addresses
-
Primary DNS: 64.240.196.2
-
Secondary DNS: 64.240.196.3
-
Leave Primary WINS and Secondary WINS servers at 0.0.0.0
-
Uncheck IP header compression
-
Check Use default gateway on remote network
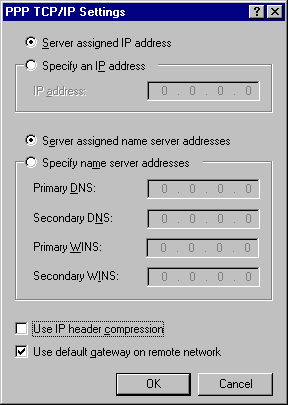
Click OK
-
Select the Script tab
Select None
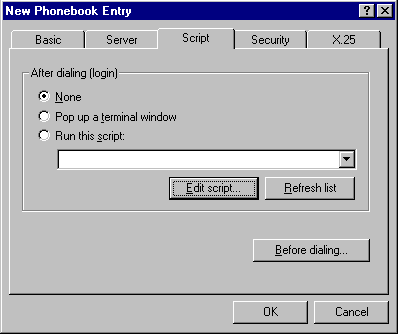
Click OK
-
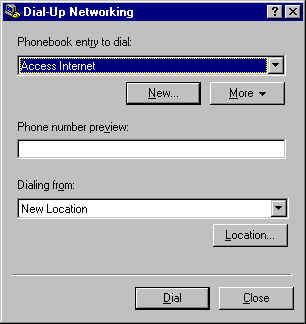
You will now be in the Dial-up Networking program, and the phone book entry we
just created should be selected in the Phonebook entry to dial button.
Click the Dial button.
-
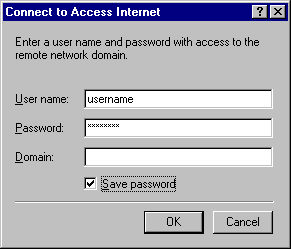
In the User name: field enter your 'username'
In the Password: field enter your 'password'
(NOTE: Your password is case sensative)
Leave the Domain field blank
Click OK to Dial