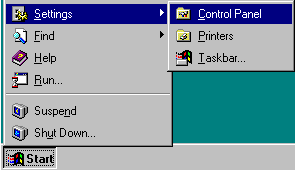
![]()
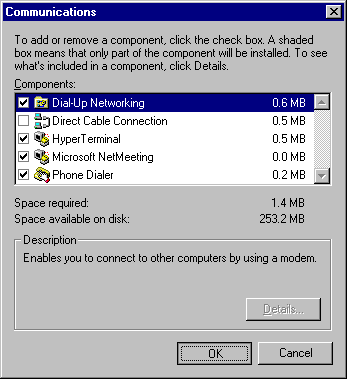
Check to see if you have a check in front of Dial-Up Networking.
If you have it checked already just click Cancel and Cancel again.
If you do not have it checked, check Dial-Up Networking click OK and OK again.
NOTE1: Be prepared to insert your Windows CDROM/Disks as the computer reqests it.
NOTE2: While copying data, your computer may prompt you with a Yes/No question
about file being copied being older then the one on your system,
just click Yes everytime.
-
If on the last step you had to install Dial-Up Networking you will now be presented
with a window asking you to restart. Click Yes to restart your computer.
Once your computer is done restarting, you will be back in Windows, inside the Control Panel.
- If on the last step you allready had Dial-Up Networking installed and you had clicked Cancel twice, you should now be in the Control Panel.
From the Control Panel double click the Network icon.
![]()
NOTE: If you have Dial-Up Adapter listed, skip to next step.
-
If Dial-Up Adapter is not listed click Add...
and double click on Adapter.
-
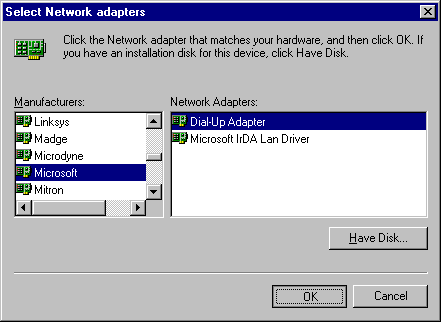
In the Manufacturers list scroll down and click Microsoft then from the right
side under Network Adapters select Dial-Up Adapter and click OK
- You should now be in the Network window, with Dial-Up Adapter listed.
-
In the Manufacturers list scroll down and click Microsoft then from the right
side under Network Adapters select Dial-Up Adapter and click OK
If TCP/IP -> Dial-Up Adapter is listed, skip to the next step.
If TCP/IP -> Dial-Up Adapter is not listed click Add... and double click on Protocol.
In the Manufacturers list select Microsoft then from the right side select TCP/IP and click OK You should now be in the Network window, with TCP/IP -> Dial-Up Adapter listed.
NOTE TO WIN 98 USERS: You will get a dialog box with only an OK button, just click OK on it and follow on with these instructions. Win 95 users will not get this dialog box but the rest is the same for both.
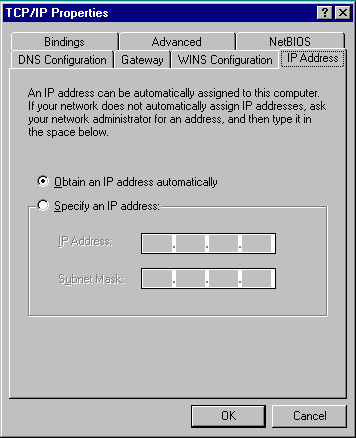
In the IP Address tab select Obtain an IP address automatically
Click the WINS Configuration tab and select Disable WINS Resolution.
Click the DNS Configuration tab and select Disable DNS.
Leave Bindings, Advanced, and NetBIOS tabs as they were by default.
Once all the files are done being copied, you will get the below window, click Yes to restart.

From My Computer double click Dial-Up Networking.
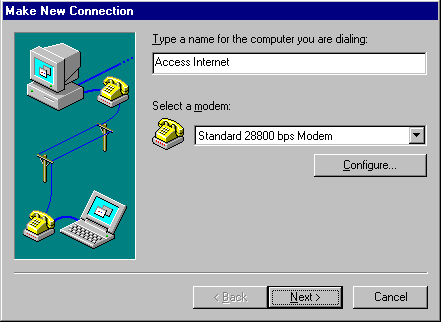
Double click Make New Connection to get to the wizard. Otherwise you will allready be in the Make New Connection wizard.
In the Type a name for the computer you are dialing field type in Access Internet and click Next
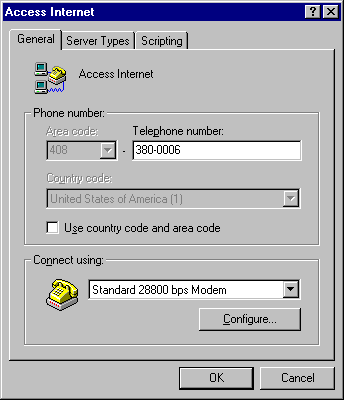
In the Area code field type in your area code (ex: 408)
In the Telephone number field type in a local Access Internet POP number.
NOTE: If you don't know which number is local to you refer to http://www.accesscom.com/system/pops.html
Click Finish
Right click on the Access Internet icon, then click on the Properties option.
Uncheck Use country code and area code and click the Server Types tab from the top.
-
From the Advanced options
- Uncheck Log on to network
- Check Enable software ccompression
- Uncheck Require encrypted password
-
From the Allowed network protocols
- Uncheck NetBEUI
- Uncheck IPX/SPX Compatible
- Check TCP/IP
- Click TCP/IP Settings...
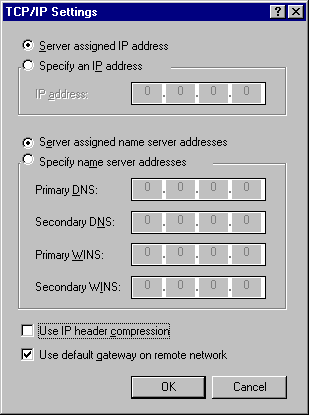
Select Server assigned name server addresses
Uncheck Use IP header compression
Check Use default gateway on remote network
Click OK
Click Yes

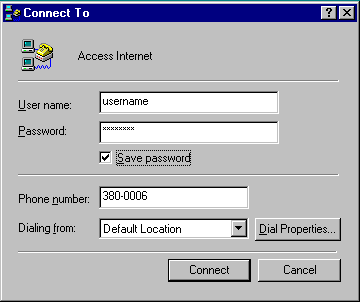
Double click on this icon.
In the User name field enter your username followed by "@accesscom.com".
In the Password field enter your password
(NOTICE: Your password is case sensative; MyPword is different then Mypword or myPword etcetra)
Make sure you have the phone cord pluged into your Modem, then click Connect.
NOTICE: This final step will be repeated everytime you wish to sign on.
