Setting Up QuickMail Pro 1.5
This page will give you the essentials for setting up QuickMail Pro 1.5
in Microsoft Windows 95/98 with your Access Internet Email account.
Configuration
-
Launch QuickMail Pro 1.5
-
If this is the first time you are launching QuickMail Pro 1.5 you should get a New Account Wizzard window.
If this is not your first time launching QuickMail Pro 1.5 Click Here
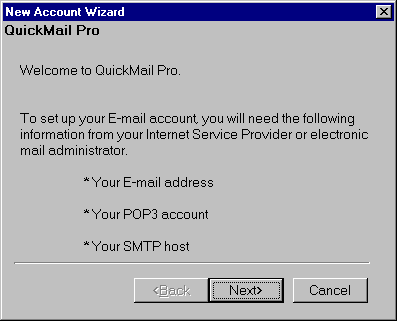
Click Next
-
Select Modem
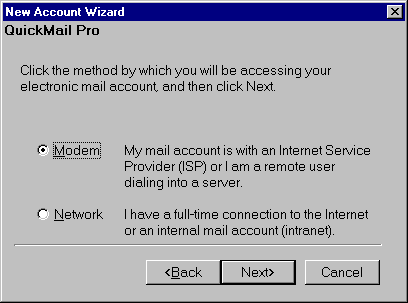
Click Next
-
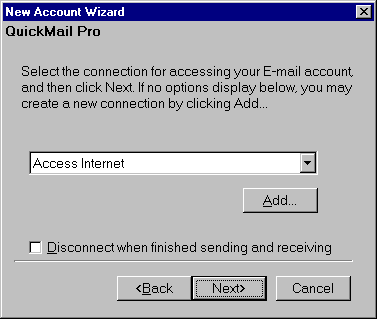
Select your Access Internet profile which you use to connect to the internet with.
-
In the Your first name: field enter your first name as you would like to appear on all outgoing messages.
In the Your last name: field enter your last name as you would like to appear on all outgoing messages.
In the E-mail address: field enter your E-mail address as you would like it to apper on the Reply-To: field.
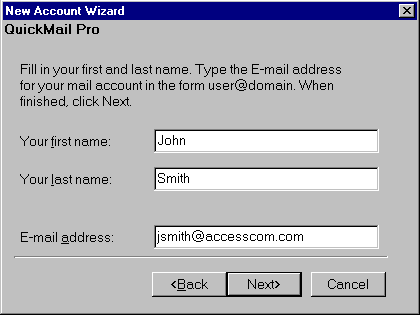
Click Next
-
In the POP3 Server Name: field enter popd.accesscom.com
In the POP3 User ID: field enter your email account username (NOTE: If your email is jsmith@accesscom.com your username would be jsmith)
In the Password: field enter you password (NOTE: Your password is case sensative)
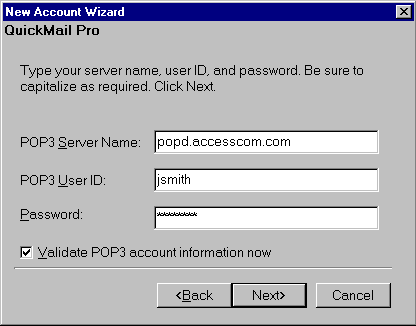
Click Next
-
In the outgoing server name: field enter: smtp.accesscom.com
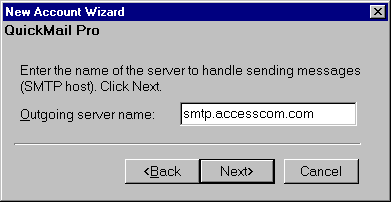
Click Next
-
Select Work online
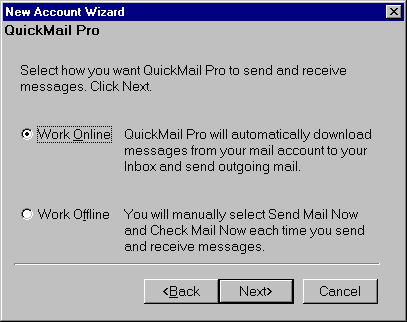
Click Next
-
Uncheck Leave mail on server until deleted
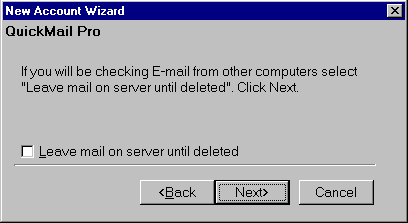
Click Next
-
Click Finish
That's it!