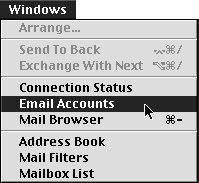
If this is the first time you are lanunching Mailsmith follow the below steps:
-
At the Set Master Password window click No Password

-
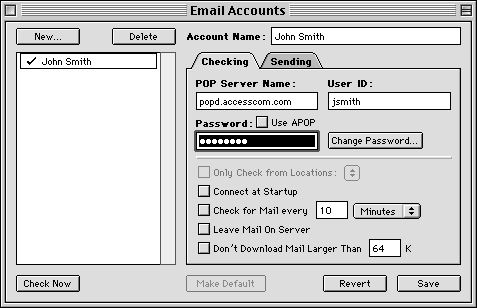
In the Name Your New Account: field enter your name.
Example: John Smith
- Click here to continue with steps according to your setup.

-
In the POP Server Name: field enter popd.accesscom.com
-
In the User ID: field enter your user name.
NOTE: Your username is the prefix of your accesscom.com email address.
Example: If your email address is jsmith@accesscom.com your username will be jsmith
-
In the Password: field enter your Access Internet Email password.
NOTE: Your password is case-sensative (ex: password is different than Password).
-
Uncheck Use APOP
- Uncheck Connect at Startup
- Uncheck Check for Mail every...
- Uncheck Leave Mail On Server
- Uncheck Don't Download mail Larger than...

-
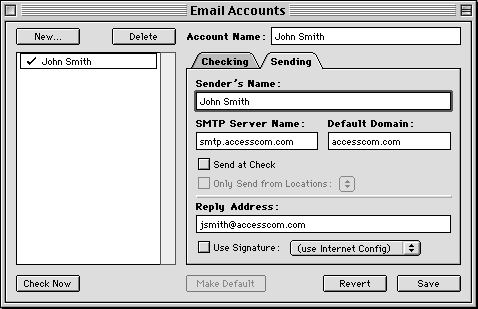
In the Sender's Name enter your name as you would like it to appear on all outgoing
email.
-
In the SMTP Server Name: field enter smtp.accesscom.com.
-
In the Default Domain: field enter accesscom.com.
-
Uncheck Send at check
-
In the Reply Address: enter your Access Internet email account example: jsmith@accesscom.com.
NOTE: If you have a domain name and you would like people to only see your domain account example jsmith@yourdomain.com enter it here.
